So, you’ve been unsatisfied with your hosting provider for some time now. You’ve done your research and got your hands on a brand-new cPanel hosting solution. What now?
While the process might seem daunting at first, the key to success and a seamless migration is in good preparation and following these steps. Regardless of whether your website was made in WordPress, Joomla, or another popular CMS, the principles are the same.
In this article, we’ll guide you through the process of migrating your website and email from one cPanel to another. There are numerous ways to go about this, but this article assumes you do not have access to the current server via SSH or have no experience with it.
Preparing for cPanel to cPanel migration
One of the wisest proverbs known to mankind is most likely “Assumption is the mother of all mistakes.”. We highly advise you to do this as the first and foremost step when considering a host change, even before purchasing a new cPanel hosting package.
1. Check your domain
Check where your domain is registered. Do you have access to a portal where at the end you’ll be able to change the NS records on your domain?
2. Check your domain resolving
Confirm that your domain resolves as expected and that the website and email are really using the server/cPanel you assume they are.
You can use online tools like Google’s Dig to check your domain’s A record (website) and MX record (mail). If they both resolve to the same IP, it means they’re on the same server.
3. Check your NS and lower TTL
On the same page, you can see the NS records. This is where your DNS is and where you’ll later need to make changes. If they’re the Nameservers of your hosting provider, you can make changes to the DNS via your current cPanel.
In your current cPanel lower your TTL to 300 (seconds, meaning 5 minutes). Wait for the old TTL to expire (usually 14400 seconds, meaning 4 hours). We do this so that when we later update our IP’s in the DNS after the migration, we only have to wait 5 minutes for the changes to propagate.
NOTE: Keep in mind that NS (nameserver) changes on your domain can take up to 24-48 to propagate, so this is a nice way to speed up the process.
If you’d like to read up a bit more about DNS and the most common record types, feel free to take a moment to check out our blog post regarding DNS zones.
4. Check Disk usage
In your current cPanel, review Disk Usage under Statistics. This ensures you have enough space to complete the migration.
5. Check the PHP Version You’re Using
On your current cPanel account, check the PHP version you’re using as well as the extensions. Logon to your new cPanel and make sure to set up the same PHP version and compare extensions.
6. Check the MySQL Database(s)
Depending on your CMS, determine if MySQL databases are in use. For WordPress, this information is in the wp-config.php file, while for Joomla, it’s in configuration.php.
7. Don’t be afraid to ask
Features vary from hosting provider to hosting provider, even if they both use cPanel. If unsure regarding any of the points mentioned above, don’t hesitate to ask your current provider for clarification or confirmation about how your services are set up.
Phase One: Download
Collect your files/folders
You can transfer your files by either connecting via FTP (preferred method) or by compressing its contents via cPanel’s File Manager and downloading the ZIP archive.
Focus on the following folders:
public_html– the root folder of your applicationmail & etc– these will be needed for having the emails on your new cPanel
Collect your database(s)
You can easily export and download your database/s via phpMyAdmin.
Phase Two: Upload
Upload files/folders to your new cPanel
You can do this as mentioned before via FTP or you can again use File Manager and upload the ZIP archives you made before into the corresponding folders and hit Extract.
Ensure the following mapping:
- Files in
public_htmlgo topublic_html. - Files in
mailgo tomail. - Files in
etcgo toetc.
Phase Three: Database Setup
Create a new database
On the new cPanel create the new database and database user. Don’t forget to assign the database user to its database and assign privileges.
Not sure how? Check out our tutorial with video instructions.
Import your database
Use phpMyAdmin to import the database.
Phase Four: Web Cleanup
Update Paths in the Database
Depending on your CMS, you might need to update the paths in the database.
For example Joomla doesn’t store its paths in the database, but WordPress does. If your application path has changed from, for example, /home/someolduser/public_html to /home/hellonewuser/public_html/ and you use Wordress, you’ll have to use a Search&Replace plugin to update.
Never done it before? Then we highly recommend you check out our blog post How to change domain name in WordPress web site. Although you might not be changing the domain itself, the process is the same for updating your paths.
Update the following:
- If your database name has changed from, let’s say,
someolduser_wpdbtohellonewuser_wp, as well as the password, don’t forget to update yourwp-config.php, configuration.php or corresponding configuration file depending on your CMS. - Also be sure to check your
.htaccessand update paths there if needed.
Phase Five: Email Checkup
Verify email accounts
Check your Email Accounts list to confirm cPanel has detected all email accounts and their contents.
Set Email Routing
Under Email Routing make sure it’s set to Local Mail Exchanger.
Phase Six: Testing
Test your website
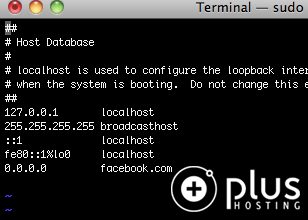
Before redirecting the domain to the new server, we always advise checking the website with the hosts file.
The purpose of using the hosts file is to “trick” your computer into loading the website from the new server before the switch is live. Its location will depend on the OS you’re using, for which you can find instructions here.
Your line would look like this:
IP.OF.THE.NEW.SERVER youdomain.tld www.youdomain.tld
If unsure, you will find your new server’s IP on your new cPanel’s frontpage on the right.
When this is setup, open your domain in a new browser window (remember to clear cache or use incognito mode) and test everything.
NOTE: Don’t forget to delete the line from your hosts file after testing is done.
Phase Seven: Redirect
When all is working as expected, login to the cPanel account you’re migrating from and update all the IPs to the new one.
NOTE: Don’t forget to add ip4:YOUR.NEW.IP.ADDR at the end of the spf record before the “all” keyword, where YOUR.NEW.IP.ADDR is the IP of the new server. We wouldn’t want our emails to be marked as SPAM, would we?
5 minutes after the change, you can check if the domain is resolving correctly from the new server. You can again use, for example, Google’s Dig.
Phase Eight: Update NS Records
Remember when at the beginning we asked Do you have access to a portal where at the end you’ll be able to change the NS records on your domain? At your domain registry, you can now update the NS records to the new ones. If unsure, ask your new hosting provider how they’re named exactly.
Done!
Congratulations! You’ve now successfully migrated from one cPanel account to another.
Did You Know?
Why migrate when you could be watching movies, reading a book or tending to your aquarium? Here at Plus Hosting we offer free migrations with every hosting package purchased!
All you have to do is drop us an email and we’ll set up everything for you!


